CUSTOMIZING QUICKBOOKS INVOICES
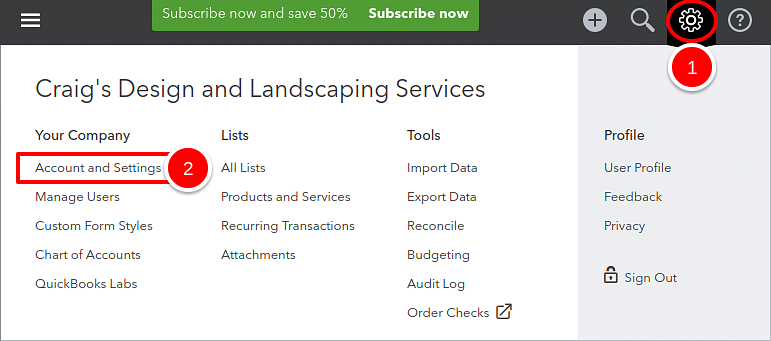
1. The first step in creating your invoices in QBO is to access the sales settings by clicking on the Gear Icon in the upper right corner in your QuickBooks.
2. Next, click Account and Settings, under “Your Company”.
3. In the Account and Settings window, click on Sales settings on the left menu.
4. Next, you’ll click on the green button in the upper right corner “Customize Look and Feel”,to customize invoices and other sales forms in QuickBooks Online.
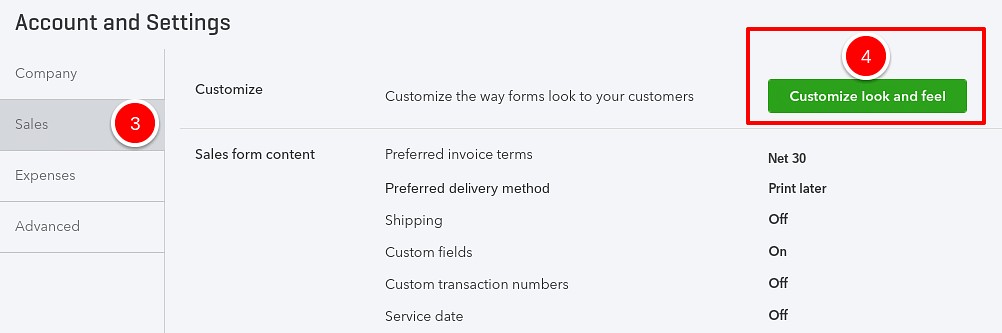
The Customize form styles window will open.
CUSTOM INVOICE STYLES
5. from the Custom form styles window, click on the New Style button on the top right. Select “invoice” from the drop-down menu.
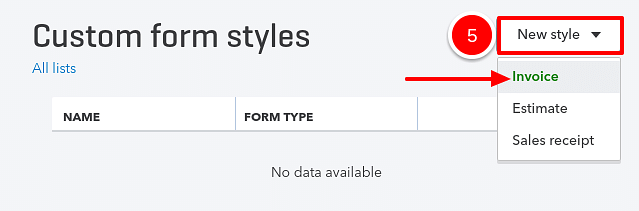
The invoice customization window will open.
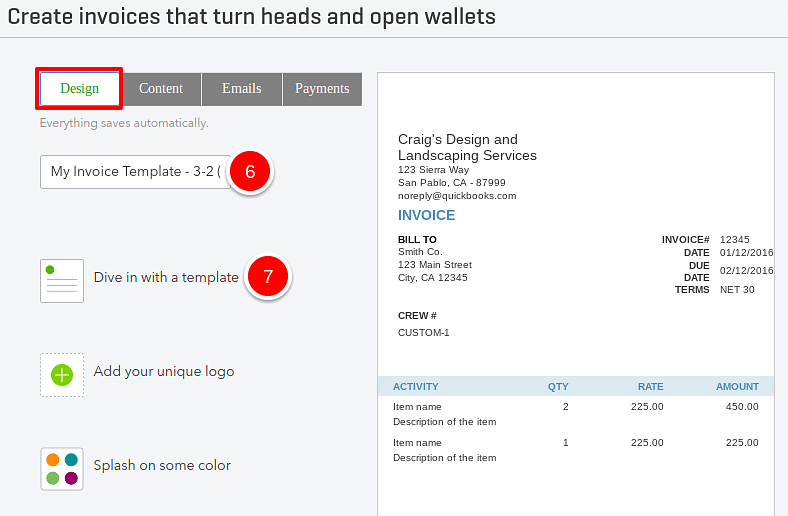
6. From the Design tab, start by giving your new template a name. Note that your changes will automatically save.
7. Select “Dive in with a template” to choose a form style to begin customizing your invoice.
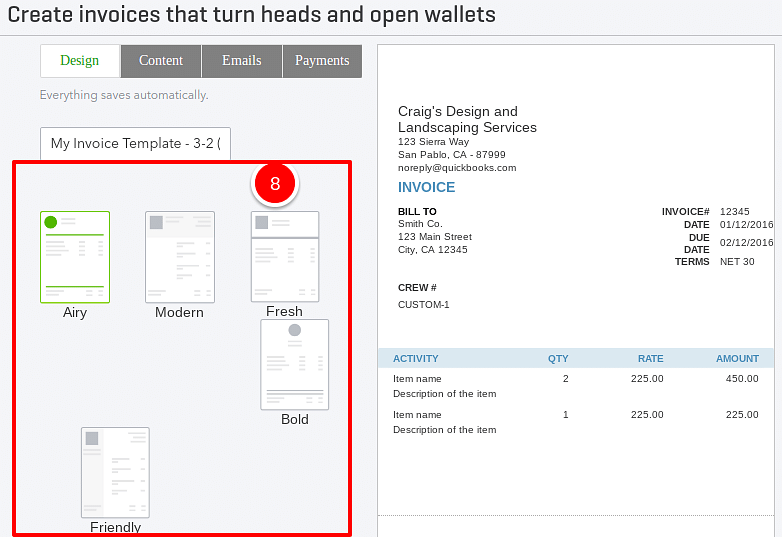
8. Select your preferred invoice template style from “Airy”, “Modern”, “Fresh”, “Bold” and “Friendly”.
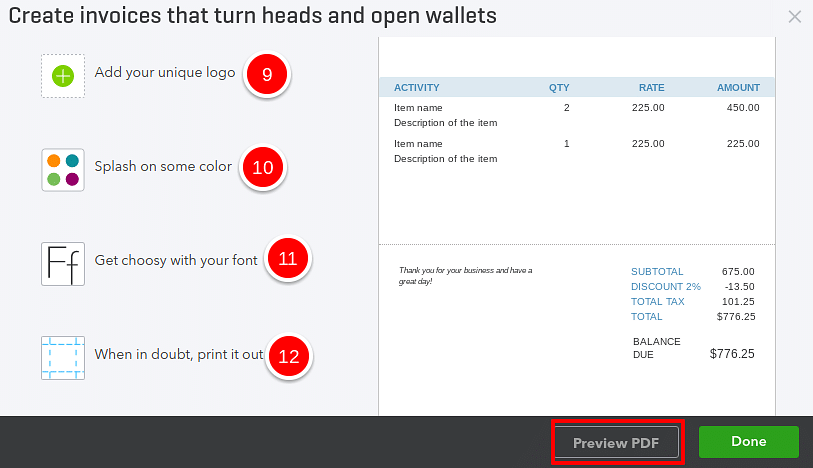
9. After choosing a template design, click on “add your unique logo” upload your company logo. Once your logo uploads, you will choose a display size (S, M or L), and your placement (Left, Center, Right).
10. Click on “splash on some color” to update the colors on your form to reflect your preference. You can choose from the pre-populated color palate, or enter a color hex value manually.
11. You’ll also be able to “get choosy with your font”, to select between Arial Unicode MS, Courier, Helvetica and Times New Roman, along with specifying 8pt, 10pt or 12pt font.
12. Your changes are saved automatically. To see how your invoice will look, you can preview in PDF. Once you have the style the way you like it, go ahead and print it, making changes to your print settings here as needed.
CUSTOMIZING THE LAYOUT OF INVOICES
Your next step in customizing your invoice is selecting the content layout.
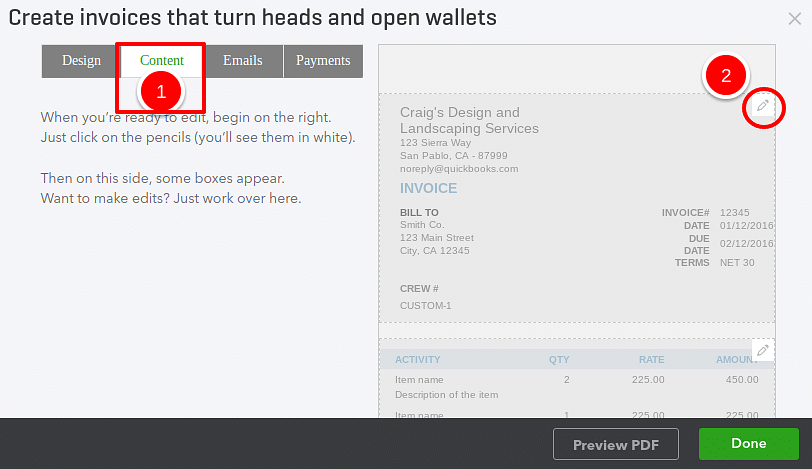
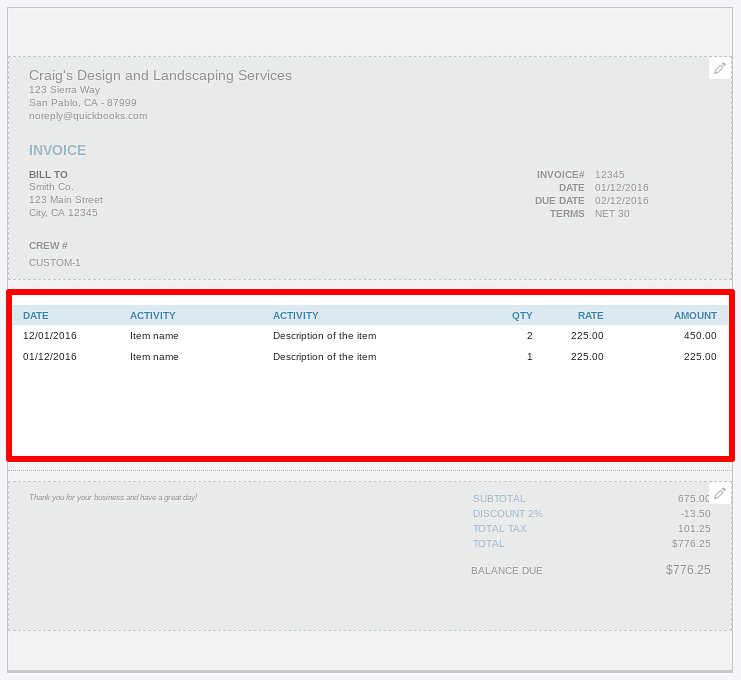
1. Select the “Content” tab in the invoice customization There will be a sample invoice, divided into three sections. There three sections are:
- The Header
- The Activity Table
- The Footer
2. Click the white pencil icon on the upper right of each section to customize different sections of your future invoice.
CUSTOMIZING THE INVOICE HEADER
The first content layout to customize will be the Header of the invoice.
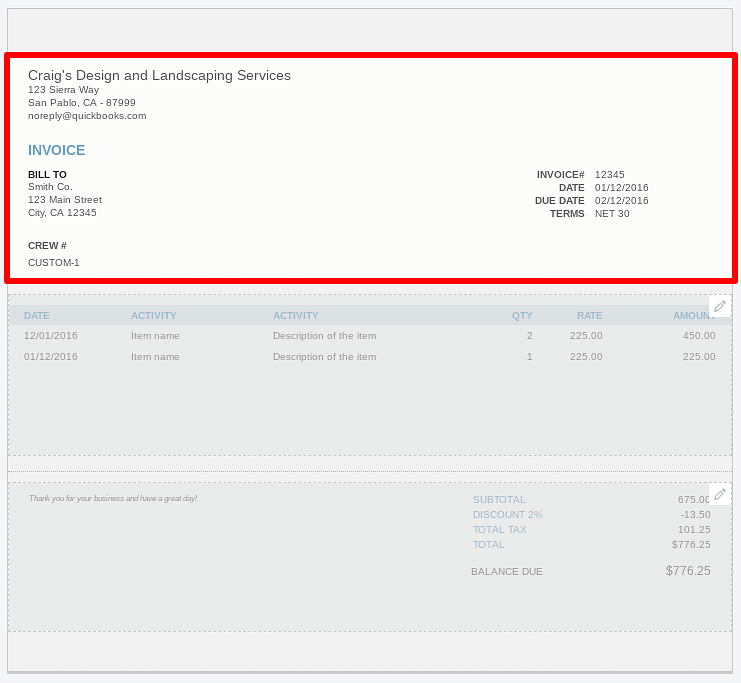
Within the Header section, you will be able to customize:
1. Your company details – Which details of your company name address, email, website, and phone you want to show up on the invoice. You can select which details to display on the invoice template by selecting or de-selecting the corresponding check-boxes.
2. Form – Next, customize your form names, form numbers, or use custom transaction numbers.
3. Display – What you want the customer to see – payment terms, due date, shipping method, payment method
4. Custom fields – You can create up to 3 custom fields to display in your header, giving each field a unique name. I highly recommend that you include payment terms and a due date so that your customers will know exactly when they need to pay you. 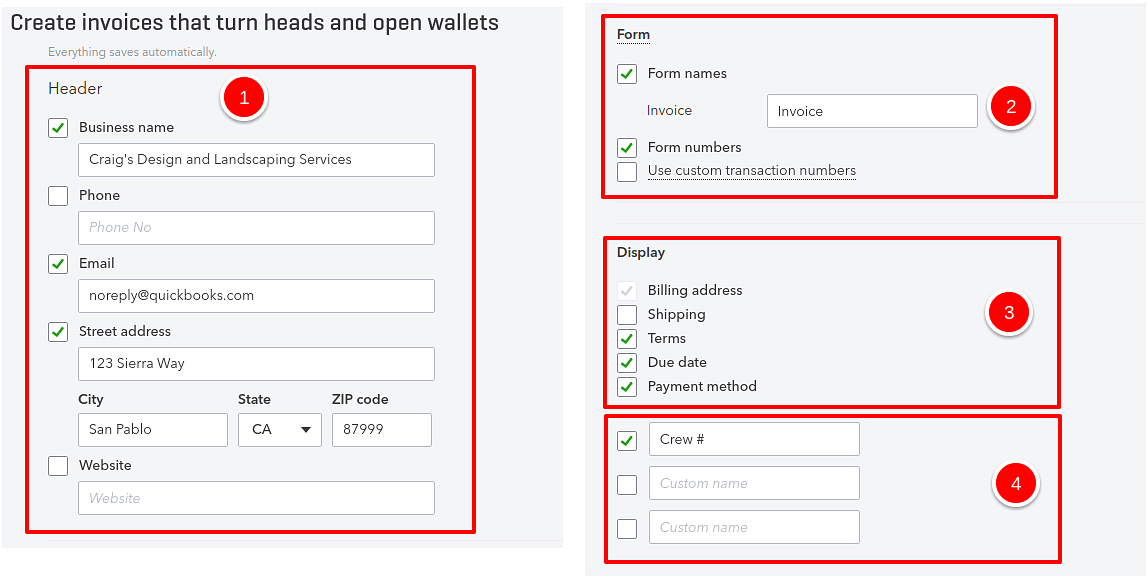
CUSTOMIZING THE INVOICE ACTIVITY TABLE
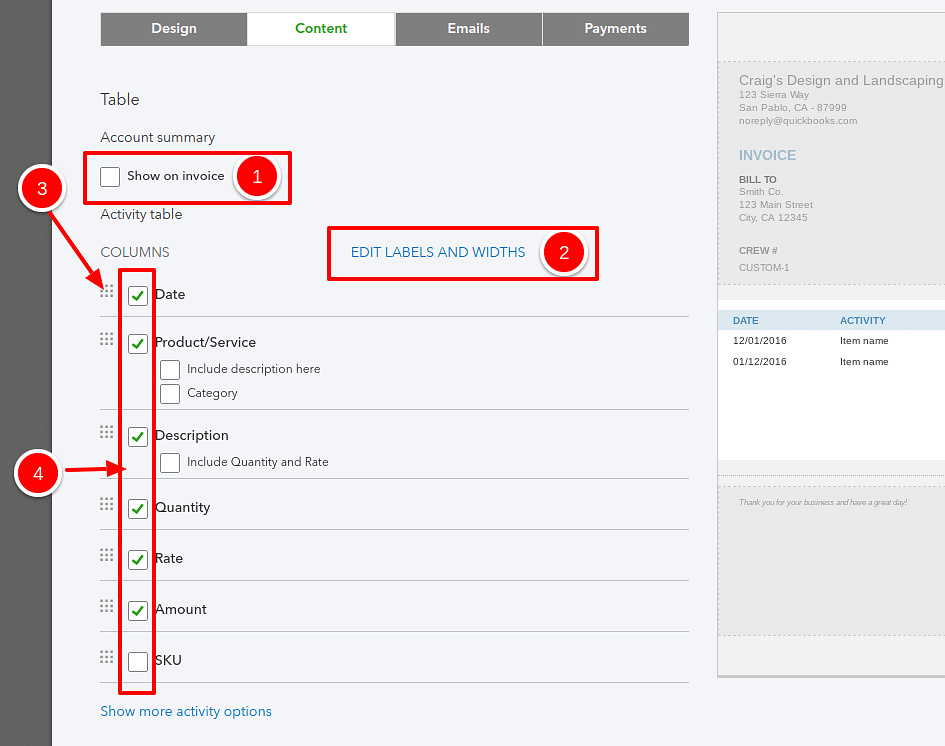
To customize the details of the products/services that you see on your invoices, you should customize the Activity Table. This would include item codes and descriptions, quantity, rate, amounts.
1. Select whether you want an account summary to appear on your invoice by selecting or de-selecting the checkbox next to “show on invoice”.
2. Select “Edit Labels and Widths” to customize the column widths and give them custom names.
3. Rearrange the order of the columns by selecting and dragging the labels in the order you choose.
4. Select which columns should show on the invoice using the checkboxes next to the column label.
5. For professional services invoices, you can also indicate whether you want to group activities together – such as staff working on the same service/activity code, whether to show markup on billable expenses, and whether you want to include details for billable time, such as including employee name, and including hours and rate.

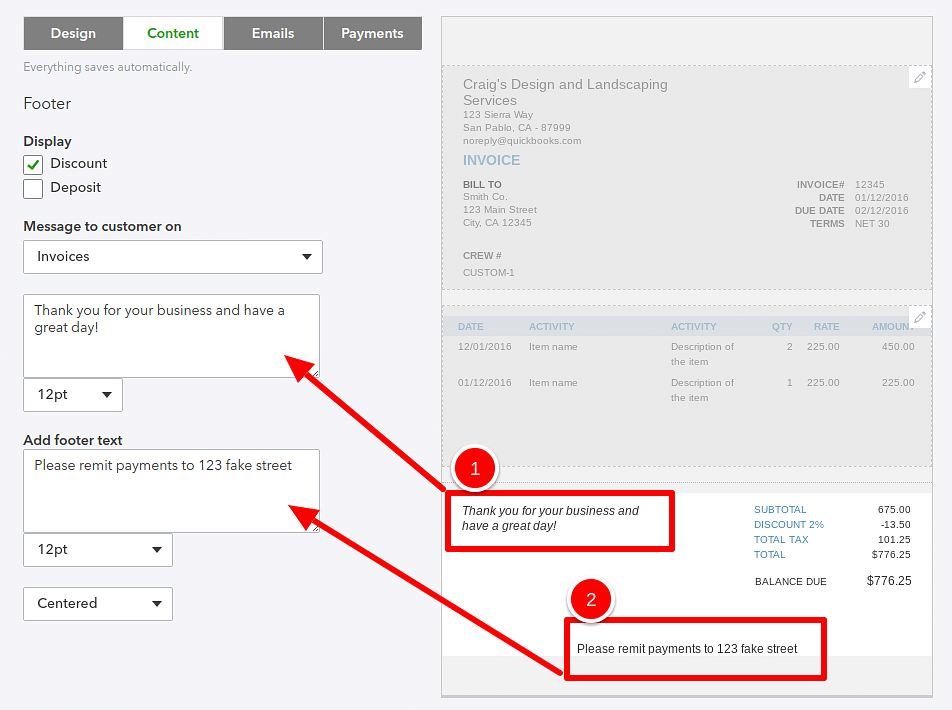
CUSTOMIZING THE INVOICE FOOTER
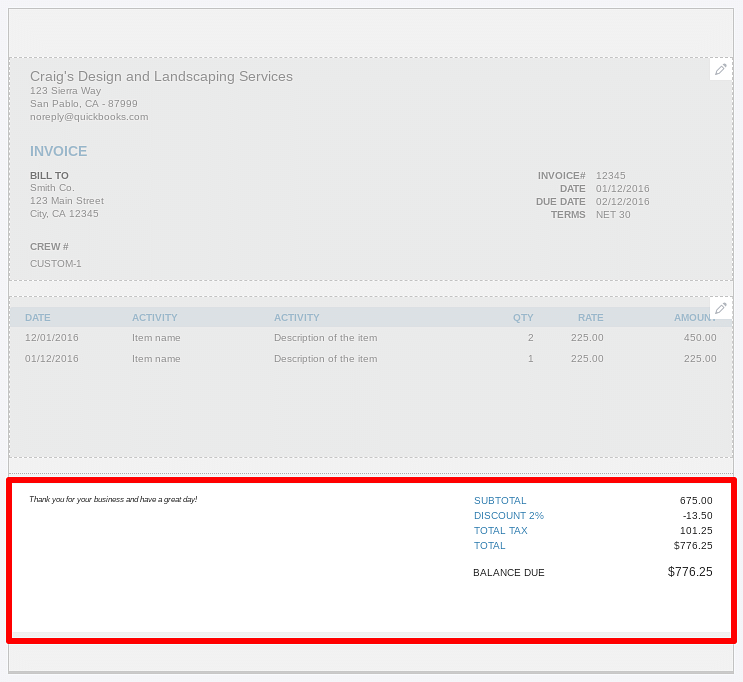
The last section in content layout customization section is the footer of the invoice template. Here you can add a message to your customers thanking them for their business, wishing them Happy Holidays, requesting referrals, etc.
There are two fields to customize:
1. Message to Customer – prints at the bottom left of the Activity Table.
2. Footer – prints at the very bottom on the invoice.
I recommend that you play around with the customization until you find the format that you want. Remember to preview the invoice by clicking on Preview PDF on the bottom right hand corner. Click Done when you’re done with this section.
I hope that this tutorial helps you to learn how to customize invoices in QuickBooks Online, and gain confidence for making a change!